skip to main | skip to sidebar

for the (heart) of stamping

About Me

My Photo
Erica Jones
My family is my life. We love to travel, especially anywhere that has "disney" in the title. I am an independent Stampin' Up! consultant. I love food and trying new things.
View my complete profile

Popular Posts

  • Stampin' Up's Owl Punch
    I am OBSESSED with my new owl punch.  I can't even tell you why.  It just makes me so happy inside! I have been using it non stop.  I lo...
  • Seasonal Fun: Bloghop with global stamping
    Welcome to the next stop of the Global Stamping Friends! Christmas! It's Christmas time!  Man the fall went in a blink and here we ...
  • (no title)
    Bloghop 12: kids Cards Welcome to the last stop on the global stamping friends blog hop! Because it's summer and scorching hot, ...
  • Hippo Happiness: Favourite Bundle in 2020/2021 Annual Catalogue
    Welcome to another Global Friends Stampin' up Blog Hop! I have been absent on here for over a year. For those of you who don't know,...
  • Global stamping friends blog hop 15
    Welcome to my stop of Global stamping friends! This is our 15th blog hop, Anything but a card. Welcome! I am in Surrey, BC, Canada, which...
  • Global Stamping Friends Blog Hop #16: Festive Celebrations!
    Welcome to the next stop of the Global Stampin' Friends Blog Hop! This one is called "Festive Celebrations". This is my...
  • Global friends bloghop #18
    welcome to the next stop of the global friends bloghop! This months topic is LOVE and I’m so excited to share a very simple pop up box...
  • In Colours 2019- 2021: Global Stamping Friends Blog Hop:
    Welcome to the next stop on the global friends Blog Hop! This month's topic is the new In Colours.... I have been insanely busy th...
  • Global Stamping Friends Bloghop #20:That Little Bit Extra
    Hello and welcome to the next stop of Global Friends! Thanks for joining me. Well, this month we are all about highlighting those lit...
  • out of the box...
    I've noticed that my cards tend to be bold colors, whimsical, and young as a general rule... a big reason for this is because I work wit...

2010-2011

2010-2011
Here's a link to the full catalogue. Warning: products are addictively wonderful!

Pin It

Join my team as a demonstrator!

Join my team as a demonstrator!
want to earn a little extra money? Want to get a minimum 20% discount on Stampin' Up! products with lots of perks? Just click the image above and click "join me". The password is "join!"

Sites I visit

  • http://www.stampinup.com
  • http://www.splitcoaststampers.com

What I'm Reading

  • The Help by Kathryn Stockett
  • Irresistable Revolution:: Shane Claiborne

Blogs I visit

  • North Shore Stamper
    Hand Stamped Sentiments Challenge #375 ~ Colour Challenge
    4 years ago
  • srosecreative
    delta fire hall’s family day
    13 years ago
  • The Stampin' Grounds
    The Retiring Accessories List is Here!
    14 years ago

What I'm listening to

  • Aftermath Hillsong United
  • Speak Now Taylor Swift

Followers

Blog Archive

  • ▼  2020 (1)
    • ▼  August (1)
      • Hippo Happiness: Favourite Bundle in 2020/2021 Ann...
  • ►  2019 (1)
    • ►  July (1)
  • ►  2018 (6)
    • ►  December (1)
    • ►  September (1)
    • ►  August (1)
    • ►  July (1)
    • ►  April (1)
    • ►  February (1)
  • ►  2017 (12)
    • ►  December (1)
    • ►  November (1)
    • ►  September (1)
    • ►  August (1)
    • ►  June (1)
    • ►  May (1)
    • ►  March (2)
    • ►  February (1)
    • ►  January (3)
  • ►  2016 (9)
    • ►  December (1)
    • ►  October (2)
    • ►  September (2)
    • ►  June (2)
    • ►  March (1)
    • ►  February (1)
  • ►  2015 (12)
    • ►  December (1)
    • ►  November (1)
    • ►  October (1)
    • ►  September (1)
    • ►  June (1)
    • ►  May (1)
    • ►  April (3)
    • ►  March (2)
    • ►  January (1)
  • ►  2014 (14)
    • ►  November (2)
    • ►  October (2)
    • ►  September (3)
    • ►  June (3)
    • ►  April (2)
    • ►  February (2)
  • ►  2013 (9)
    • ►  November (2)
    • ►  October (2)
    • ►  August (1)
    • ►  July (1)
    • ►  May (2)
    • ►  February (1)
  • ►  2012 (22)
    • ►  December (2)
    • ►  November (1)
    • ►  October (2)
    • ►  September (1)
    • ►  August (3)
    • ►  July (1)
    • ►  June (1)
    • ►  May (1)
    • ►  April (3)
    • ►  March (1)
    • ►  February (2)
    • ►  January (4)
  • ►  2011 (29)
    • ►  December (1)
    • ►  November (2)
    • ►  October (2)
    • ►  September (1)
    • ►  August (1)
    • ►  July (4)
    • ►  June (3)
    • ►  May (3)
    • ►  April (2)
    • ►  March (4)
    • ►  February (3)
    • ►  January (3)
  • ►  2010 (44)
    • ►  October (2)
    • ►  August (2)
    • ►  July (4)
    • ►  June (4)
    • ►  May (6)
    • ►  April (6)
    • ►  March (6)
    • ►  February (11)
    • ►  January (3)

Wednesday, May 4, 2011

Why I (heart) the Big Shot

A month or so ago, I was making my cards for Regionals, when my 3 1/2  year old daughter asked to help.  I let her help me with the Big Shot... and I realized how simple it is to use, and yet how necessary it is in my card making and scrapbooking!
Does the big shot intrigue you, or inspire you, but you aren't totally sure if you can figure it out?  Maybe it's pretty low on your wish list... or you're just not sure if it's for you.
I felt like that at first.  Plus, it was just one more thing that if I bought it, I would need to invest in a bunch of more products when I purchased it. I was SO wrong!

What is the Big Shot? 
The Big Shot is the perfect cutting tool for every project.  There is so much you can do with it!  The big shot it my favorite tool... I use it for everything! I love that you can make cute boxes, like this milk carton:

You can make beautiful pillow boxes for a nice pillow gift (at a Lady's retreat, or for youth at camp)

or scallop envelopes, or even a 3D pop up Christmas tree or three tier cake!)

How about these flowers? I just LOVE this card... (cased). This is using the Blossom Party die...

And I love how simple it has made my scrapbooking!  I love that you can die cut alphabets, instead of having to stamp individual letters... I love that you can quickly cut out large images, and make co-ordinating pages.
And the build a bear dies! You get to make the bears, and then there are endless options for clothes!
Now, financially, you may be concerned that you don't have enough resources.
Well, let me help you get started.
The machine itself is $132.95 This includes cutting pads and the multipurpose platform. Then I would recommend getting the top note $29.95  which can be used for scrapbooking or cards (scroll through my archives on my blog to see how often I use it!)...
then, a textured impressions embossing folder... I recommend the vintage wallpaper or the perfect polka dots... here are some examples of it being used...

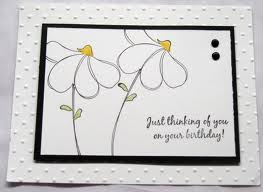
I just love how it adds texture without having to do too much! And they are only $10.95 each!  SUCH a deal... I hardly even make a card anymore without using these folders. And you can't go wrong with the paper buttons... they add so much, without much effort. And they are only $6.95, and you can make any color, any size, any time!
And then, if you're a big scrapbooker, I recommend an alphabet! Saves me SO much time!
Here's your shopping list if you're new to Big Shotting... (is that a word?!)
Big Shot Die Cutting Machine          $132.95 (item #113439)
Top Note Bigz Die                            $  29.95 (item #113463)
Vintage Wallpaper emboss folder    $ 10.95 (item #120175)
Perfect polka dots emboss folder     $10.95 (item #117335)
Naturally Serif Alphabet*                 $26.95 (item #113453)
  *needs decoritive strip cutting pads and spacer platform

And that's it! Now remember, you can shop 24/7 on my website, and get any of these products sent directly to your door! My personal website is: www.fortheheartofstampin.stampinup.net.  Don't forget, if your order is over $200, then you get a level 1 stamp set free, plus $20 free from the catalogue! (Another bigz die!)

Thanks for looking.... 
Erica


Posted by Erica Jones at 2:09 PM 0 comments

Tuesday, April 26, 2011

May is National Scrapbooking Month!

Did you know that May is National Scrapbooking Month?
This usually means one thing: Stampin' Up! sales!!!! I LOVE this promotion... we are offering some of our best selling stamp sets for 30% off! They are great for scrapbooking, but they are also great for card making!
Here's the list:

30% Off Stamp Sets
 Party Hearty         $23.07 (wood mount)
Grunge Rock          $18.17 (wood mount) OR $13.97 (clear mount)
 Animal Stories      $13.97 (wood mount)
Printed Petals        $17.47 (wood mount) OR $12.57 (clear mount)
 Simple Friendship  $22.37 (wood mount)
 Word Play             $36.37 (wood mount) OR $25.17 (clear mount)
 Sweet Shoppe Alphabet Lower $27.27 (wood mount) OR $20.97 (clear mount)
Remember, you can shop 24/7 on my website online! All you have to do is click on the picture, and it will take you to my online store!
Here's some pictures, to help you decide:
party hearty:
One of the best birthday stamp sets ever is on sale, and I use this ALL THE TIME! Especially for male birthday cards, because those are so hard to make.
grunge rock:
one of the best stamp sets for teenagers and scrapbooks.

animal stories:
so cute! there are many projects using this animal set that are adorable!
printed petals:
what a great deal for this stamp set! It makes a quick, simple and lovely background for any card or 12 x 12 scrapbook layout! 
simple friendship:
 word play:

this is an amazing set! Use it for a 3 x 3 mini card, and you've got a simple, amazing card!
here's an example of a card that would take less than a minute to put together, made by Andrea Walford:

There are some albums and other things on sale with this promotion too... if you've never scrapbooked before, and are a little weary, may I suggest you get the my digital studio? It is quick, fast, and always has great results! You can make albums online, and then have them printed in high quality albums! I do recommend this for anyone that doesn't want to spend the time to make albums on paper. Use the same great artwork, colors, and accessory images found in our current product line to create personalized digital projects. The options are endless: create photo albums, calendars, and greeting cards using My Digital Studio. Once you've created your personalized gift or heirloom, have it printed in our high-quality print facility and delivered to your door or print it at home. And it is only $106.95! Compaired to other products on the market, that is a total steal... plus, it's SO easy to use!
To get more information on my digital studios, or the rest of the sales on albums, email me at yummy_starbucks@yahoo.ca 

Posted by Erica Jones at 10:40 AM 0 comments

Tuesday, April 12, 2011

Spring is Blossoming Promotion!


Spring is in full swing at Stampin' Up! with Sneak Peek products from the upcoming 2011-2012 Idea Book & Catalog.  Be one of the first to get these brand-new products!

Four Frames Stamp Set
(Coordinates with the Decorative Label Punch #120907)
Wood item: #123440 $25.95
Clear item: #123442 $19.95


Paisley Petals Designer Series Paper
Item # 122367 $12.50

There are two ways you can get your hands on these brand-new products:
  • Spend $25 on any Stampin' Up! products and become eligible to purchase both the Four Frames Set and Paisley Petals Designer Series Paper.
  • Host a $395 workshop and get the Four Frames Set and Paisley Petals Designer Series Paper for FREE!

You can shop any time at my store! Don't forget to get your Stampin' Up! Grab Bag while supplies last!! Contact me with any questions!  


Posted by Erica Jones at 10:56 AM 0 comments

Saturday, March 26, 2011

Fabulous Folds Card!

Apparantly, I enjoy being ambitious, because I tried this card this month that was a HUGE undertaking... but it really paid off... because it's amazing! It is the biggest WOW card I have ever seen... however, I can't take the credit for the design, because I got that from the recent "Stampin' Success" Magazine that I get for being a demonstrator every month (another wonderful reason to join my team! I can't live without this magazine now!)
This is a video of how it turned out:
Once you start making these cards, you'll never be able to stop! The beauty is that the fold itself is so amazing, and as long as you stick with the same color scheme and basic ideas, you can change it over and over again to be a Christmas Card, a Birthday Card, a Valentine's Card... whatever you wish!
Here's the final card (I apologize for the strawberry shortcake DVD in the background, this was the quietest my house has been all week!)
The design is a little hard to get, so I took pictures step by step for you... I choose to make it a birthday card, and decided that my "theme" would be hearts and cupcakes.
A few thoughts about this card:
- make sure that you make precise and exact cuts and fold
- keep the same 3 or 4 color theme throughout the card, to have continuity
- have one or two "ideas" and stick with them (cupcakes and hearts)
- don't have anything too bulky on the card, like ribbons or other ornaments, or it will make it too hard to fold
- if you use a simple brad, have another piece of paper to cover it, as all sides of the cards will be seen at some point
- you need a paper cutter with 16ths

Here are the instructions:
Start with a half piece of 8 1/2 by 11 sheet of cardstock, cut lengthwise, to 4 1/4 x 11.

Next, cut it in half, so that you have two pieces that are 5 1/2 x 4 1/4:


Then, you score one of the pieces at 1 1/16" horizontally (this is the top picture) and the other piece at 1 3/8" vertically (the bottom part of the picture)

Next, you cut those each in half... the top one, you cut to 2 3/4" x 4 1/4" the bottom one you cut to 5 1/2 x 2 1/8"
Here's what they look like when you're done:
and

you now have all 4 pieces need to make this card.
Now, use sticky strip (it needs to be a very strong adhesive) on each of the two 2 3/4" pieces... see the above picture... use 2 strips, 1 inch or so (less than half way up) on either side of the score lines (each of the pen lines are a piece of sticky strip).
This is where it gets a bit dicey, but you can do it! Take the tape off of one of the 2 3/4" pieces, and place the two pieces of card stock that are 2 1/8" side by side, on the tape, making sure that the score lines match up.
Here's what it will look like:
now, take the stick strip off the other piece, and adhere it like this:
when together, it will look like this:
And then you are done!
Watch the video to figure out how to fold it, and decorate it one fold at a time! (Use your bone folder to get nice, crisp folds).
That's all for now, hope you enjoy making this card!
My card recipe:

Stamp Sets:
Party Hearty
Birthday Bakery

Colors:
So Saffron
Soft Suede
Regal Rose

Tools:
heart small
scallop oval extra large
small tag
large tag

That's all for now!
Posted by Erica Jones at 4:35 PM 0 comments

Wednesday, March 16, 2011

Clear Mount Stamps or Wood Mount Stamps... which is better?

Well, I had all these grand plans to blog this week, a bunch of things i've been working on... those things are going to have to wait...
I am leaving for Chicago tonight for Comic Con (more specifically, C2E2) ... yes, you read that right... for my husbands 30th birthday, I surprised him (with the help of lots of his friends) with a trip for C2E2... and it's this weekend!
I tried to explain to him that this is a very gracious gift on my part, and he didn't totally understand until I told him that it would be like him taking me to a Stampin' Up! Convention, and participating in all of the make n' takes, and lectures, that he 'got' it...
Anyway, that's what I'm doing this weekend.
This got me thinking to last month when I was at Stampin' Up! Vancouver Regionals... and they talked about the different advantages to wood verses clear mount stamps...
I'm going to share with you there thoughts, and mine as well!
First, the most important thing is that which ever you choose, you will enjoy high quality rubber stamps in both clear or wood options.  The rubber on our stamps is incomparable... it has even won awards!
Why wood?

I like the wood stamps for several reasons:
1) You never have to worry about packing clear blocks, they are each individually and permanently mounted for quick stamping
2) For smaller images, they are easier to stamp with, and less likely to get lost
3) Background Stamps! I love using background stamps in scrapbooking, or as a textured layer for a background to my cards.. and they are only available in wood

I like the clear stamps because:

1) They are cheaper! (I went to a workshop almost 4 years ago, and I COMPLETELY fell in love with stampin' up's coordinated images... at this time, they didn't have the option of clear, and my husband and I each have a modest budget of what we are allowed to spend... and this makes me able to buy more for less money!)
2) I love being able to stamp multiple images at once... this is super fun, fast and easy... and it always allows straight images!
3) You can see through the blocks to placement, allowing perfect images 100% of the time
4) Way less storage! Our stamp sets come in DVD sized boxes, and the images are printed right on the side of the boxes, which is better if your storage is limited
5) You can reposition your images over and over again to suit your needs

Now, upon first glance, you may think I prefer the clear over the wood... when in fact, I prefer both! I have a giant wish list of stamp sets.. and I want some in wood and some in clear.  For instance, anything with really small pieces, I want in wood... except alphabet sets, or word sets, because you can combine multiple letters or words for easier and more precise work.

Now, if you've had the clear stamps, and they've fallen off, I've got a few suggestions:
1) My favorite suggestion is to use a little dotto directly on the cling side of the clear stamp sets, and this guarentee's the stamp to stay on... and it will stay on everytime you use it with every single block!
2) If you don't have dotto, just place the stamp rubber side down on the table, and apply medium pressure to create a good cling.  This should keep your image from sliding off.
3) For storage, keep the rubber that you take your stamps out of, and store them in there... that way you won't lose any stamps! Here's a picture of what I mean:


That's all the tips I have for now... which do you prefer, clear or wood? I'd love to hear your preference and your reason.
Posted by Erica Jones at 1:36 PM 0 comments

Wednesday, March 9, 2011

Aviary and Build a Bear Classes

I'm excited to show you some projects I'll be working on for some classes coming up...
Aviary Class:: $10 to make 3 cards, or $30 includes the clear stamp set, or $40 includes the wood stamp set:: Saturday, April 9th 1pm to 3pm
This is the stamp set:
 

I love love LOVE it! I can't stop using it... I'm not even that into birds, but I just love it!
We will be making 3 cards... here is the first... I saw this as a demo at Vancouver Reginals, and it totally blew my mind:
This is the front:

  This is the inside:

So fun!
Here is card number two:
(this is the first idea, I will have to change the colors and a few products to make them current... but you get the idea)

hehe, that owl is my FAVORITE!
lastly, a simple one:


Again, this is just the idea, I will be changing it slightly. But so cute!

The second class is my first Mommy and Me Class!

Mommy and Me Build a Bear Class:: Saturday, April 2nd 10am to 11am:: $10
Make a color matching game, here's an example (case not included):
and a felt bear to dress up (here's an example on a card... it will include a brown bear, and then 2 outfits to change the bear).
 Whew! That's all for now... if you're interested in either of these cards, email me to save your spot...there is limited room! (yummy_starbucks@yahoo.ca)
Posted by Erica Jones at 9:13 AM 0 comments

Tuesday, March 1, 2011

out of the box...

I've noticed that my cards tend to be bold colors, whimsical, and young as a general rule... a big reason for this is because I work with teenagers and children... and my club consists of mostly young people.
However, this weekend I was at Regionals downtown, and included in our package was the stamp set "Nature Walk".  Now, this is a stamp set that I wouldn't have purchased in a million years.  However, we made 5 projects with it, and some of them were completely stunning... (I will upload them this week).  Which totally threw me off.  So this weekend, I am attending a 12 hour scrap-a-thon and providing the make and take... so I thought I would surprise everyone (including myself) and try something a little more.... antiquey.  (is that a word?!)
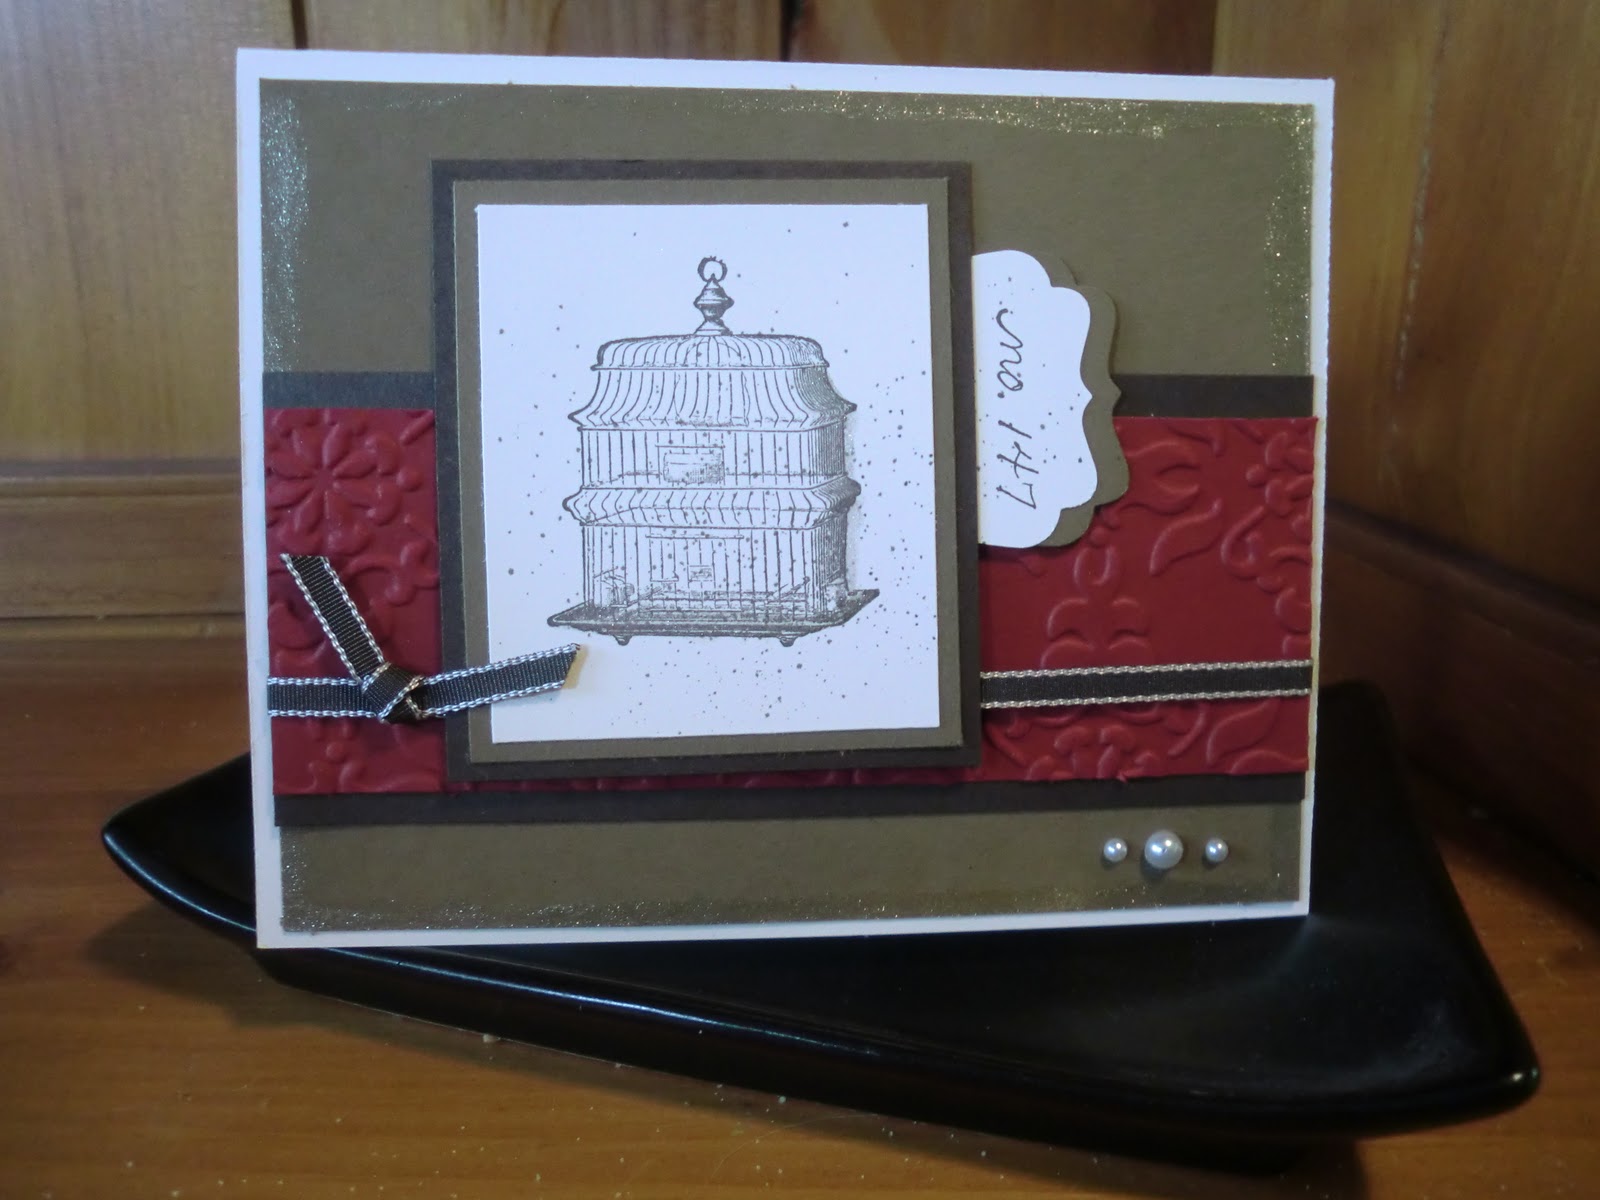
This is what I came up with:
And I am pleasantly surprised! The colors are nothing new for me... early espresso, very vanilla, soft suede and cherry cobbler... but I used some things I hardly pull out... like the pearls (these are the BEST deal), my color sprizter, and the champagne shimmer paint... that I hadn't even opened! I am excited to do more with this stamp set... come back soon, there's more to come!
Posted by Erica Jones at 11:52 AM 1 comments
Newer Posts Older Posts Home
Subscribe to: Posts (Atom)
 

avandia